Showing posts with label DIY. Show all posts

Friday, August 25, 2017

How to Slice a Mango the Easy Way


Do you love mangoes as much as we do, but struggle with finding an easy way to cut and eat them?
I used to make a delicious juicy mess every time I cut one up,  until I learned how to use this super easy and convenient mess-free method.


My daughter in law Wendy has been using this method for years. 
However, it was actually my friend Vicki who recently taught me how to do it! It is so so easy!
No special tools are necessary
The only tool that you will need is a sharp pairing knife to cut the mango in this special way.

 Cut the mango in 3 easy steps. 

You will actually be cutting the mango into thirds with the pit being the middle part.

Do not peel the mango. Hold the mango on its side with the stem down. 

1. Slice off one side as close to the pit as possible.
2. Turn the mango and slice off the other side- you will be left with the pit in the middle
3. Place one of the sliced sides peel down and score it by making 4 lines in each direction . 


Invert and it will be in chunks. you can eat it right off  the peel, or slice the chunks into a bowl.


If this seems confusing, I found a video on Youtube that demonstrates this super easy process. Once you see it being done, you will be able to do it ! ( video is at the end)

That is all you have to do to be able to eat a mango with dignity and no mess!

We used to only eat mangoes outside on our back deck because we mutilated them when cutting them and the juice would be unmanageable. If you are a mango lover, you know that mangoes can be extremely juicy and messy. 

I've seen so many ways to conquer the mango- but hands down - I think this is the best. 


Of course you cut use a mango slicer. I have one that I bought on Amazon, and they are easy and fun to use. They kind of look like an apple slicer but are made for mangoes and much sturdier.
  OXO Good Grips Mango Slicer, Splitter, and Corer


 Mango Demonstration Video from Youtube!!


My Mango Recipes

Mango Peach Salad/Salsa


Skinny Mango Salsa

Mango Cardamom Lassi 

Mango Orange Blossom Popsicles


It's time to leave your comment, story about mangoes, etc. 

This post is shared  " Weekend Cooking"


Please consider purchasing my cookbook on Amazon!  plant-based soups cookbook (affiliate link)


My Soups Cookbook contains over 80 healthy soup recipes and 80 inspirational quotes and time saving cooking tips to help encourage, guide, and inspire readers to reach a greater level of wellness. Plant-based soups cookbook (affiliate link)  on Amazon with a "look inside" option to see all the recipe titles and introduction.

Keep this cute paper back cookbook in mind for a stocking stuffer, house warming gift, or even birthday gifts! 
  
Please consider purchasing my cookbook on Amazon!  plant-based soups cookbook (affiliate link)


Disclaimer: I am an affiliate for Amazon like most bloggers. If you click on a link from my blog and make a purchase, I will receive a small compensation at no cost to you. This helps pay for the cost of running a blog. Thank you for your support.

Tuesday, July 11, 2017

How to Freeze Spiralized Zucchini


Did you know that you you can spiralize raw zucchini and freeze it for future use? 
It's so fast and easy, you will always want to have some handy in the freezer.


Freezing zucchini lets you take advantage of summer zucchini when its plentiful and reasonable and use it long after the prolific zucchini crop has long disappeared. 


5 Reasons I like to freeze zucchini Spirals

1. I have too much zucchini that will go bad if I don't use it
2. Frozen zucchini spirals can be cooked in sautées or soups
3. Frozen zucchini spirals cook in minutes
4. Frozen zucchini spirals can last for months in the freezer
5. Less waste- 

Prep your zucchini in 4 easy steps: 

1. Use your spiralizer to make zucchini spaghetti noodles ( tutorial) 

2. Sweat your spiralized zucchini in the colander for 25 minutes by salting it to release moisture.

3. Wring your zucchini in a clean dish towel to remove moisture before freezing it. 


4. Freeze zucchini sprials in individualized portions in a baggy. 

5. Use right from bag for sautéing and cooking like in this Zoodles and Purple Cabbage recipe.


I am in love with spiralized zucchini ( yellow or green zucchini) 
because it's easy to make, low in carbs, very low in calories, and satisfies my pasta cravings.  

If you need a spiralizer, I use this oneSpiralizer By Palermo- Voted the Best Vegetable Maker, 


You can read my previous post that teaches you how to make your zucchini into zucchini pasta tutorial) 


Buy Green or Yellow Zucchini

This time of the year, local yellow zucchini squash is abundant from CSA farms and farmer markets as well as green zucchini.


This is yellow zucchini which is different from yellow squash- 

Personally, I'm just as happy with a bowl of healthy spiralized zucchini pasta, marinara sauce, and grated cheese as I am with the real pasta or sometimes I make this zoodles ( zucchni noodles) in an avocado pesto sauce with cherry tomatoes. 


Necessity is the Mother of Invention

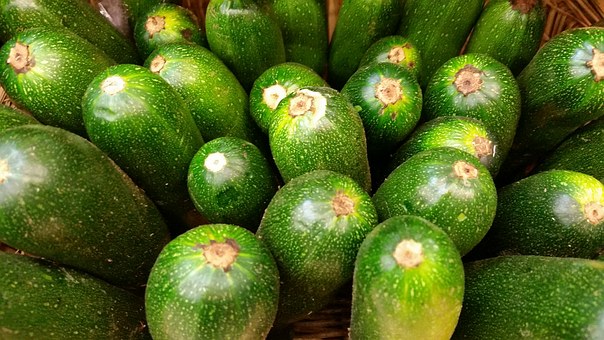
Last week I went to the farmer's market and bought 6 medium/large organic yellow and green zucchini. I don't know what I was thinking. After all, 1 medium/large zucchini makes two large bowls of zucchini pasta.

 As much as I love it, I really don't want to have to eat it every night.


I thought about freezing it, but had never done it before. It was worth a try. 
I decided to spiralize all six that I purchased,  and then froze the results. It worked like a charm, and now I have frozen zucchini pasta in the freezer all ready to use! Convenient!!


Recap:  For Best Results  
1. Spiralize the zucchini
2. Place in a colander, salt it, allow it to sit for about 25 minutes
3. Place in a clean dish towel, twist the dish towel from both ends to squeeze out the water
4. Divide into individualized portions ( about 2 cups) and freeze in a baggy
5. Do not defrost before using- use directly from the freezer
6. Use in cooked zucchini noodle recipes or soup
7. The frozen zucchini will be difficult to separate so freeze the amount you want to use for future recipes,


creamy zucchini soup ( vegan) 


What is your favorite "zoodle" ( zucchini noodle)  recipe?
Have you ever frozen your zoodles? 


Wednesday, November 9, 2016

Apple Slices Won't Turn Brown with This Tip


apples

How many times have you sliced apples, doused them in lemon juice yet they still turn brown an hour later?
  

That used to happen to me, but not any more. Not since I discovered a simple tip that keeps my apple (or pear) slices looking just the way they looked when I initially sliced them, even 4-6 hours hours later!

This method is so easy and simple, you probably won't believe it will work so well!


Monday, August 15, 2016

How to Freeze Whole Lemons for Convenience and Ease

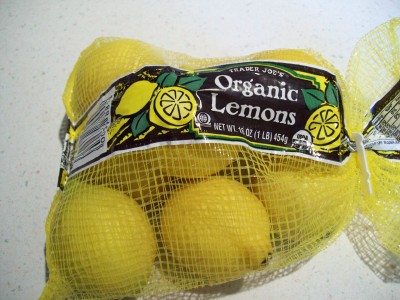
organic lemons

Did you know that you can freeze whole lemons and limes and always have one handy for fresh lemon juice or lemon zest!

I buy organic lemons or limes by the bag at Trader Joe's.  They usually are good for about a week. Sometimes I just don't get to use them fast enough, so they start to spoil. While browsing Pinterest, I found a post that says you can freeze lemons or limes for convenience and ease!
Who knew?


I love the idea!  Not only does it prevent waste, but you will always have lemon in the freezer if you need some. Frozen lemons/limes defrost quickly and are great to have in a pinch. You can even buy extra organic lemons when they are on sale and keep them frozen until you need them. 

How to Freeze Lemons and Limes: 
Wash the lemon or lime well and pat dry. Depending on how you want to use the lemons or limes in the future, either freeze the whole lemon/lime just the way it is,  or cut the lemon into quarters. Do not remove the peel. Place in a baggy and label the baggy with the date for future reference.

How to Use Frozen Lemons:
  • Lemon zest? Simply remove the frozen lemon from the freezer without defrosting. You can zest the lemon more easily while frozen. The zest itself will defrost in seconds. 
  • Lemon juice? - You can use quartered or halved lemons. Simply defrost for 10 minutes and squeeze. 
  • Make ice cubes and put a piece of  cut up lemon in each cube. Use in drinks as needed.
  • Make my Middle Eastern Lemonade Recipe
Stop! Don't Throw Away the Peel
Ever since I became aware of the intense nutritional benefits of lemon and lime peel, I've been obsessed with creating recipes that include them. Apparently, we lose a lot of the nutrients from lemons by not using the peel!

Some sources say that the peel provides 5-10 times more vitamins than the lemon juice itself and a much higher Vitamin C level.According to the a post on Healthious- I'll let you read that yourself if you are interested- lemon peel has healing properties. Another post on Healthy Holistic Living goes into even more detail about cancer treatment and lemon peel.

Actually, I recently went to a vegan pot luck hosted by a holistic researcher and  biochemist , and he suggested throwing half of an organic lemon ( with peel and pits) into your smoothies each morning ( you need to use a Vitamix or a very strong blender to completely pulverize the peel)

The same biochemist confirmed that the lemon peel has a wealth of health benefits to offer, and we lose out by not using it. Of course, he suggested using only organic lemons and pulverize well.

Two Recipes which use the entire lemon with the peel:
bold lemon salad dressing and watermelon limeade

If you would like a recipe using the peel, I use whole lemons with the peel in my Bold lemon salad dressing


lemon salad dressing

And I use a lime with the peel in my 3 ingredient refreshing watermelon limeade

watermelon lime coctail


Do you freeze your lemons? How do you use lemon peel ?

Regardless of how you intend to use your lemons, freezing extra lemons makes sense from an economical and practical viewpoint.

I'll be linking this post to these  blog carnivals

Friday, July 10, 2015

Grow Scallions in Water


Growing the ends of used scallions in water on your windowsill is similar to growing your own fresh herbs but easier ; I saw this ridiculously easy idea on Pinterest, and it works! 

You can grow a continuos supply of green onions right on your windowsill starting with the 99 cent bunch of scallions that you buy in the supermarket.

They don't even need soil to grow; They will grow in water in a small glass!

You know the white ends of the scallion with all the roots? ( the part you probably throw away?) After you use your the green part of the scallion, don't throw away the white ends. Those little suckers will grow a whole new scallion, and the scallion will grow quickly like in a week!


scallion white ends with roots
white ends after they were in water for a week


I saw the idea a long time ago, but it wasn't until last week that I thought I'd give it a try. Within one week, I have an entire bunch of scallions all over again. Yes, that quickly. Who knew?


Don't store scallions in your refrigerator

Even if you do not want to grow your own continuous supply of scallions, this method is also a way to just keep your scallions fresh. Store your scallion in some fresh water just like flowers! How many times to your find that the scallions you purchased last week went bad in the refrigerator? 

Have you ever done this before? Talk about frugal. You get all the scallions you want from one bunch. After a month or two it may get funky (change the water often), so throw away and just start with a new bunch!!


How to Grow Scallions on Your Windowsill

Materials Needed: 
A glass jar
Water

Directions

1. Wash your scallions well and use as much of the green part as you like.
2. Place the white ends with all the roots in a small glass after you have cut some of all of the green part off. Cover the white ends with filtered water.
3. Place on your counter, windowsill, deck, or patio.
4. Change the water every 3 days. ( I like to keep mine on my counter, so I remember to change the water)
5. It begins to grow immediately. Within a week, you will have tall green shoots that you can use for your cooking. They will just keep growing and growing!


green scallions growing out of a jar of water

Have you tried this before? What do you think? 

I love your feedback, so please leave a comment. 


Do you like my recipes? If you are new to my blog and would like to be notified when I post a new recipe, please enter your email in the top right hand corner of my blog.  ( you can unsubscribe at any time) subscribe by going over to the right side column and look for subscribe by email.

Just so you know: I am an affiliate for Amazon and I do receive a very small compensation if you purchase on Amazon through my blog. I appreciate the support to help cover the expenses of running the blog.


Food is my passion. I am gluten intolerant, busy. and strive for a healthy balanced lifestyle. It has taken me many years to come up with easy healthy recipes that meet gluten free, vegetarian and real food standards. On my blog I share my journey, my struggles, my discoveries, and my new recipes. I hope you find ideas, resources, and recipes that will be helpful to you. Come Back soon.


Pin It Please leave a comment so I know you stopped by. Scroll down to the end of the post and click on comments.

Friday, May 8, 2015

Homemade Almond Milk ( Fast and Easy )


Homemade almond milk in a jar

Making homemade almond milk is truly fast and easy. In fact, I made my very first batch of this creamy treat last week for the first time. It involved using only two ingredients: almonds and water, and had only four simple steps: soak, blend, strain, drink. After soaking, the entire process took me only 10-15 minutes. It was fun and tasted amazing!

I'm sold on only making my own because store bought almond milk is stored in containers that are lined with plastic and plastic leaches estrogens into the food. And many brands add chemicals. My homemade drink tastes just as good if not better and I store it in glass.

I've stopped buying plastic water bottles last year, but I didn't realize that cans and cardboard containers are lined with plastic as well. The convenience of buying containers of almond milk
( along with organic veg soup broth, canned beans, coconut milk) is exposing me to a continuous flow of estrogens which is linked to not only breast cancer but weight gain!  I'm making an effort to cut back.

If you want to understand more about the danger of estrogens in plastic ( water bottles, milk bottles, plastic lined cans and containers for milk, broth, soups,  plastic storage like Tupperware, etc.) and the link to obesity, breast cancer plus,  I'm including some informative links that I researched on the Internet.

Otherwise, just scroll down to the  Almond Milk Tutorial and enjoy!

Plastic Containers and Estrogens

Study: Plastic Leach Hormones

Exposure to Chemicals through Plastic


Almond Milk Tutorial

Author: Judee Algazi
Soak Time: 24 hours
Prep Time: 10-15 minutes


Supplies Needed:
Blender or high speed blender like a Vitamix
Fine meshed strainer or cheese cloth

Ingredients  : 
1 cup of organic raw almonds ( the almonds must be raw)
4 cups of filtered water

Add- in options: 1 tsp pure vanilla extract, pure almond extract, or any extract of your choice, cinnamon, soaked dates,  honey etc.

Directions
Cover the almonds with pure water and soak for 12 hours on the counter ( if you need to leave them longer , refrigerate for up to another 24 hours )
Discard the soaked water and then pop off the skins ( they will pop right off)
 and place almonds in the Vitamix or blender
Process until all almonds are blended and it becomes a smooth white liquid.
Pour the liquid into a cheesecloth lined bowl ( I used a very fine mesh strainer)
Allow to strain out all the particles and the liquid strains into a class bowl- squeeze out
and pour the almond milk into a Mason jar or jar of your choice.
bowl of water with soaked almonds
Almonds soaked in water for 24 hours or up to 48 hours if you can't get to it.
Vitamix filled with water and almonds
I made this batch without removing the skins; however, it is better to pop off the skins


mesh strainer for almond milk
I added the blended mixture to a fine mesh strainer to allow the milk to separate from the pulp
you could also use cheesecloth- when strained
Pour the milk into a glass container to store

Whether you have turned to almond milk and coconut milk as an alternative to dairy, or you just like some variety, making your own is a real treat and fast and easy!

Trust me,  I am not a fanatic or an alarmist who is trying to a slave to the kitchen spending hours making everything from scratch. I am concerned about the lack of information provided to the typical consumer ( you and me) about the health risks caused by some of the additives that are in processed foods and their containers and the things we just take for granted. The old saying, "Consumer Beware" is still valuable!

Disclaimer: If you click on the links and purchase anything from Amazon, I do receive a very very small compensation. This helps me defer the cost of running the blog. Thank you.
If you like this idea please share it with your Pinterest followers 68 

This post may be share some of the following Weekly


If you are new to my blog and would like to be notified when I post a new recipe, please enter your email in the box for subscription in the right top of the blog.. Don't miss a recipe - about one or two a week.  ( you can unsubscribe at any time)


Wednesday, October 16, 2013

Faux Pumpkins with Ribbon


white plastic pumpkins


Decorating faux pumpkins for the fall couldn't be easier. I've never made a craft before. This is my very first attempt and surprisingly it was easy. I always admire all the beautiful crafts on Pinterest, but I usually don't make anything because I'm intimidated due to my lack of skills and experience.

My friend Fay always decorates her fireplace mantle for every occasion. I wanted to get in on the fun, so I decided to decorate with pumpkins for the fall season. I used faux plastic pumpkins, some ribbon, and glue. That's it!


Believe it or not, this is my own creation. I just thought up the idea. I found two different ribbons that I liked, cut them into strips and just used wood glue to paste the bottom and the top to hold the ribbon in place. I did have some help from my friend Vicki. We experimented together until we found a glue that held onto the plastic, and cut the ribbon until we found a length that we liked. Pasting the ribbon was a little tedious, so I welcomed the help. We made 4 pumpkins total.

We only had one mishap! We used the scissors to hold the ribbon in place on the pumpkin with some crazy glue and the scissors glued closed. They are now forever crazy-glued together. It turned out we didn't even need crazy glue because it didn't work on the pumpkin.  The wood glue seemed to work best.

You can use any color ribbon and create all kinds of effects..

I love the way it turned out. Am I now a crafter? I love to hear your comments!

black and white pumpkins

May be shared on some of the following blog carnivals: 
                                Blog carnivals

Pin It Please leave a comment so I know you stopped by. Scroll down to the end of the post and click on comments.

Friday, October 28, 2011

Fabulous Ideas For Fall

There are so many wonderful ideas posted on the Internet and Pinterest. I found 5 fabulous finds that are especially good for the fall season. I hope you like some of these ideas!

www.glutenfreematters.com 

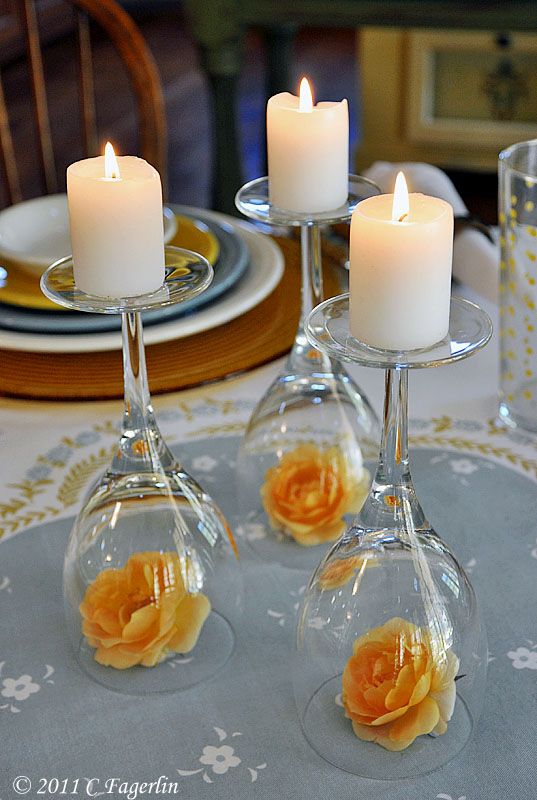
Fabulous Find #1 comes from a blog called
The Little Round Table.
Her table settings are fabulous. Instead of roses in the glass, you could use mini pumpkins and orange candles.


Fabulous Find #2
Strawberries and whipped cream for a fast easy delcious dessert. The recipe, directions, and video are onJoy of Baking
Photo from Joy of Baking 


Fabulous Find # 3
This is such a great idea. Keep prepackaged healthy snack trays in the refrigerator for kids. Healthy snacks are all ready for the taking. 
This idea, directions, and  photo are from a blog 
called Real SimpleThere are lots of other great ideas on the blog as well.


Fabulous Find # 4 and photo are from a wonderful blog that I follow called Oh She Glows. Angela says her blog is, "healthy vegan recipe blog chronicling my life" Isn't that the cutest idea for a Thanksgiving place setting.


The vegetable crudite with dips in the presentation of a pumpkin is a great healthy Halloween snack. 
Fabulous Find #5 This fabulous Entertaining  comes from a low carb, sugar free and grain free blog called,The Rogue Cookie 
photo from Rouge Cookie)


Which Idea do you like best? Please leave a comment. 

Printfriendly